Monday, August 29, 2011

Announcing Our 6th Annual Hair Show Featuring Diva B and Sir M!

Hi! My name is Natalie, I’m the owner & creator of Cocoa Curlz. I have two curly cuties! My daughter, Princess B is 4 yrs old and my son Prince Cai is 2 yrs old. My children are ½ African American, ¼ Native American, and ¼ French/Scottish. 

Princess B’s hair type is soft, medium thickness, becomes dry/frizzes quickly, and a mixture of 3A/3B (Troy Polamalu would be the perfect example!). Prince Cai’s hair is very thick, doesn’t frizz but gets a little dry, and is showing a mixture of 2A/2B/2C when wet. We’re in the process of growing his out! 

I began styling my daughter’s hair when she was 2, that’s when it became much more curly. Thank God for my big sister, Ty for help! I would also Google for other ideas and tips. Daddy even helps sometimes!
Our hair care routine is very simple. I deep condition twice a month, shampoo once a week, and co-wash in between shampoos when necessary, and apply hair milk every morning. I moved from NJ to northern Ontario, Canada late last year and I live in an area where there is only one place available for AA hair care products, which is almost an hour’s drive away. I decided to make my own natural product line to have something available for others in my community that would be chemical-free. 

My biggest pet peeves about hair care are people who have the ‘good/bad hair’ mentality, having hair on your head is plenty good. Seeing little girls with relaxed hair. Like other sensitive subjects, I believe that should be decided by the child & not the parent. You can cause serious damage and burns to the child’s scalp/skin, not to mention blindness if it’s not done properly.
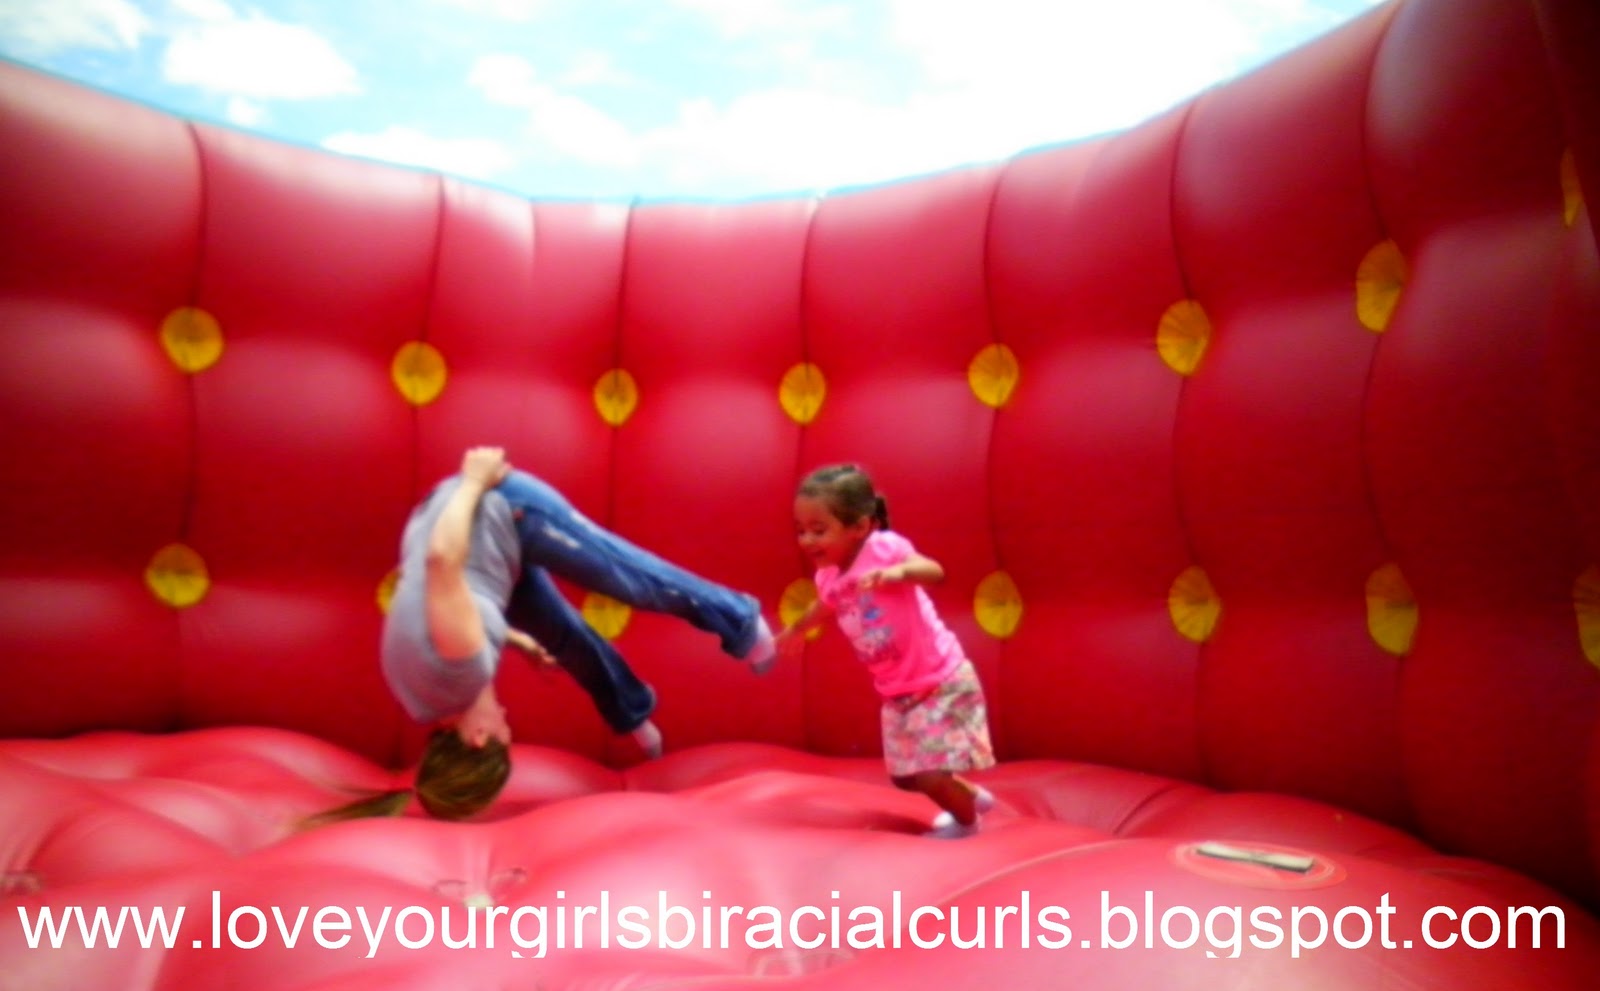
We’ve never had to deal with criticism from others, my daughter has always received compliments from others about her beautiful curls. She absolutely loves her hair and the time we spend together styling. It’s our mommy/daughter time!  We pick out a movie with snacks and just enjoy the quiet time.


The products I would recommend to other hair-moms would be anything without SLS, Parabens, & Mineral Oil for the most part. Read the labels and educate yourself as much as you can, options are endless. Cocoa Curlz works very well on my children, but may not work well for another person. Avoid using heated stylers (straighteners, blow dryers, etc.) as much as possible.


Thank you Natalie! For contributing to our annual Hair Show it was a pleasure getting to know you and your dear little ones <3 I must say that both of your children's hair when they were younger was EXACTLY how my Diva R's hair was and it turned out to be exactly how your daughters too! Her hair went through similar transitions and was just as straight as a board and jet black in color when she was born and it has since then transformed into being a reddish brown color with a big mixture of type 2 textures with a smidge of type 3. I bet you never thought their hair would ever curl when they were babies! that's what i thought and was shocked to start seeing crazy all over the place curls appear as Diva R was growing! Diva B and Sir M are just gorgeous! I LOVE how you embrace their cultures and natural hair to the fullest! It is so wonderful to meet fellow mommies who feel that these area's are of utmost importance and that they should be treated as such.


I just love the adorable pic of Sir M with the red shirt and dab of drool! I could just squeeze his little cheeks. Such a cutie and he favors his sister too! Diva B is also gorgeous and her styles are always so cute and girly!


Please check out Natalie's website and online shop Cocoa Curlz and all that she has to offer from her special formulation of Natural Hair Care Products! (Currently she is only shipping throughout Canada but that may change in the future!). While on that thought feel free to "Like" her FB page.

Diva R's Mommy-Kim

Tuesday, August 23, 2011

Original Moxie Just Gel Styling Concentrate

Ever find your self searching beyond feasible lengths to find the PERFECT gel that is natural, non sticky and affordable? Well i know i have and it seems that most shelved gels have that yucky alcohol, formaldehyde, petroleum, and many more less desirable and harmful ingredients. Those bad ingredients also like to leave a sticky feel behind or a gunky mess. 

So i was up to the challenge as i came across Original Moxie. I came across this product line while i was at Naturally Flyy and the first thing i noticed was that this company is Michigan Based! This was a plus because i always feel its a must to show some love to companies from my home state.
There was a whole table full of many appealing products! I just started picking them up one by one and reading the bottles. My focus was to find a gel so i pretty much stayed on that train of thought as i was shopping. I noticed that all of the products were completely organic/natural and didn't even use any of the popular disguisable fillers or preservatives!

So i had to choose between the Oasis Moisture Gel and the Just Gel. I wasn't looking for a moisturizing gel because those have less of a hold generally and more of a moisture to them.

Just Gel it was. I am always a sample buyer because i have big time issues with buying full size products unless i know how they are going to work for us. Especially when they are expensive. I decided to wait and order the sample from the website as Rachel didn't have any samples for sale with her at the time.

I received the sample in this cutesy wrapped packaging about a week or so after ordering.

Just Gel™ Styling Concentrate


My initial thought was WOW this is much smaller than i thought it would be... I immediately noticed the consistency too which i was really curious about. The jar reminded me of a Gerber baby food jar :)


I was intrigued by the little card that was included! It was detailed so greatly with its claim, instructions and ingredients!


At this point i was VERY eager to try this and i couldn't wait! Of course my first thought was hmm lets see how this does during cornrowing and lets see how it will perform on all variances of Diva R's hair.


Product Description

Despite its name, this product is so much more than a simple gel.  Though not fussed up with a lot of extra ingredients, this alcohol-free gel is derived from flax seeds, infused with a high concentration of botanical extracts and fortified with Panthenol & Silk to deliver strong, touchable hold without the Dried-Out-Crunchies.


Alcohol-free styling gel.
Those with medium to thick hair with just about any degree of curl who want definition and frizz control.
Put your hands together for the one, the only, the amazing Flax Seed!  This little miracle of nature is derived simply by boiling the dried seeds of the Flax plant.  The gooey extract that is released contains many of the seed's natural proteins, minerals, amino acids and omega fatty acids, while providing strong hold for any style. 
Incredibly fruity and slightly floral.
Work through wet hair after all other styling products have been applied. Use more for extra control and less for softer styles. Style as usual.
Got too much of a good thing? Break up excess hold with a small amount of Hair Bling™ applied to dry hair.
This our most universal product in its appeal to a variety of hair types.  It doesn't matter if you're male or female, black or white - chances are, you will find a use for this product.  Some clients combine it with Lux Locks™ for flawless, frizz-free twists, and others who use it as a stand-alone to give control and lift to straight hair.
Flax Seed Extract; Distilled Water; Aqueous Extracts of Amla, Bhringraj, Comfrey, Irish Moss, Ginger, Horsetail, Neem, St. John’s Wort, &Yucca; Organic Aloe Vera; Castor Oil; Potassium Sorbate; Polyquaternium-10; Acacia Gum; Sorbitol; dL-Panthenol; Sodium PCA; HE-Cellulose; Honey; Phenoxyethanol (and) Caprylyl Glycol (Paraben & Formeldahyde-Free Preservative); Vitamin E; Citric Acid; Silk Amino Acids; Essential Oils of Jasmine, Litsea Cubeba, Sandalwood (3% Dilution); Sweet Orange, Tangerine, & Ylang Ylang.


Our Review


Color: Beige/Faded yellow

Scent: Orangey botanical fragranced

Texture/Consistency: Liquidy with a light feel
Cost: $3.00 per 1oz and $21.00 per 8oz (Shipping was 5.10 for just the sample)


My first bit of amazement was with the fragrance! I couldn't quite pin point it but i could definitely smell an orangey-botanical burst of YUM upon first smell! I was enlightened by the fresh and great pure smell which is also very light in nature and not pungent. 


Next the liquidy consistency was sort of interesting, until this product i have not seen a liquidy gel so lots of thoughts were going through my mind.  This gel isn't liquidy such as water it is more like thickened water (for lack of a better example). If i tipped this over it would spill easily.

Here is an idea of the texture to the best degree i could capture it...


I was unsure about the texture still, wondering if it would really hold for a few days.  


I moved on to experimenting on Diva R's dry hair. I must say that i could immediately notice a difference in feel as i applied it to her dry hair it seemed to work more like a thick gel and it held much better.  It is my FAV on her dry and damp hair. The texture is not like a gel at all,  and it would be just that much better if it was more solid :)  The cost is a little steep too from my budgets stand point but the way i look at things are you get what you pay for most of the time anyways.


I WILL be trying more Original Moxie soon!


Diva R's Mommy-Kim


Monday, August 22, 2011

Love Your Girls Biracial Curls: French Braid Style Cornrows

Lately i have been so busy that which ever style comes to mind i just let my hands create as i think it up. I thought hmm its been a while since i French Braided Diva R's hair so why not do some FB's and add a little corn-rowed flair to them.

My goal was a fast and easy style that i could easy change up and fix if needed so she can wear it for at least a few days.

I gathered my Distilled, Curly Butter and Juicy Spritz. I then parted three sections in the design pattern that i freestyled which would be the angled look. I love the angled parts because they accentuate the Diva's face very well and i love the girly-ness amplified along side her cute baby hairs...

Here are the results :) 


Note the half cornrow half french braid appearance. Cute and textured different look while being simple and quick with a touch of versatility= a well put together style perfect for a full day of play and fun!

I used the distilled water as our pre-style moisturizer, followed by the Curly Butter for our light hold product/sealer and finally the Juicy Spritz for our finishing moisturizer.

From beginning to end the style took 20 minutes.

I am still learning how to french braid so as i go they are getting better slightly each time. To me these are harder than cornrows to perfect. There are inverted and everted ways of doing this. 

I was able to keep this style fresh for 2 days and then i re did it and it stayed for another 2 days :)


Diva R's Mommy-Kim

Sunday, August 21, 2011

Winner's Circle Darcy's Botanical's Giveaway Has Concluded


Our Darcy's Botanical's giveaway has officially concluded as of August 19th after a blessed near two and a half weeks of us being able to host such an awesome giveaway! It has become evident that Darcy's is VERY sought after :) I wish we had many more to giveaway, though this time around only one lucky winner will receive this amazing 3 pack of DB products in their full size's that we hand picked.


We would like to send a HUGE *HUG* and Thank You out to Lysandra for blessing us with the opportunity to review and host such an amazing giveaway!!!


Reflect on our RAVING reviews by typing "Darcy's Botanicals" in the "Search Our Blog" search box on the top left of my blogs main home page... All four of our results will appear for your viewing.


The winner will get specifically the...


Curl Styling Leave In Cream in 8oz


Organic Coconut Oil and Aloe Moisture Pudding in 4oz


Pumpkin Seed Curl Moisturizing Conditioner in 8oz


Random/org chose...


Who Said:


CONGRATS JAMILA! Please email me with your shipping information within the next 24 hours so we can get your goodies shipped asap :)

God bless each and everyone of you who took your time to participate in our giveaway, enter our giveaway, share and tweet it, spread the word about it and to everyone who shared something with everyone. There will be more giveaways to come in the future, i just wish this time i had more Darcys to go around due to the overwhelming response! It was a HUGE hit and we are hooked on Darcys officially!

Diva R's Mommy-Kim

Saturday, August 20, 2011

DIY Natural Hair Barbie's: Take Two

Were at it again and since our last rendezvous i have picked up some pointers in hopes to better our future experiences with creating our natural hair dolls.  I picked a doll this time around with longer hair about mid-back length and with this length in mind i wanted to try a different technique to achieve a different curl pattern...

This Barbies hair has a coarser texture to it and before i began i snipped about 1/8 of an inch off to get the straggler ends removed.

Remember in our first trial run creating our own DIY Natural Hair Dolls (here) where i just parted and grabbed a small section of hair and wrapped it around the pipe cleaner in a downward spiral form without altering its state. See below an example of what the section looked like before i wound it around the PC. 


Notice that i did not twist the strand and i did not do anything but simply wrap the section around the pipe cleaner. This was meant to create the looser type curls. I illustrated this on the latest Barbie that i did so you could get an idea of how i did it differently this time.

Below you can see that instead of wrapping the section of hair as it was around the pipe cleaner, i twisted it prior to wrapping.


This was done in efforts of creating a different type of curl pattern more closely related to a full afro from tight spiral curls.  I decided to wrap the twisted sections around each pipe cleaner differently also. Last time i began at the very end point of the pipe cleaner and just  wrapped the hair around it until the hair "ran out" where i would then wrap the PC around the hair twice to secure it in place and then clip the extra end piece.

This time (as you can see below) i bent then pipe cleaner in half evenly and set it over top of the twisted section of hair that was going to wrap onto the pipe cleaner, so that each even side was on the right and left of the twisted strand. I then twisted the two sides of the pipe cleaner around the base twice forming a nice secure base and the wrapped the twisted section TIGHTLY around the now unified pipe cleaner sides.

  
Exactly how i wrapped it the first time around except for there being two pipe cleaner sections i am wrapping the section around instead of one. Notice how there are the two end pieces remaining of the pipe cleaner. I just twisted them around each other twice securing the ends so that the pipe cleaner will stay on. I also parted out more sections this time for more curls that would be more tightly rolled.

I left those ends on and didn't plan on cutting them until i was done boiling the hair.  I learned a nice and easy way to cut the straight ends that are underneath the pipe cleaner as well as the remaining ends of the pipe cleaner without hacking too much or not cutting enough because you sure don't want to start separating the curls and realize you didn't cut enough. Its harder to go back and cut efficiently after you begin separating the curls or brushing out the afro.

I got out my "junk" medium sized sauce pot, filled it 2/3 the way full and let it boil vigorously.  Then I held the Barbie head first into the pot and let it boil for 8 minutes. This i did early in the afternoon so i planned on letting the Barbie sit and air dry all day after i squeezed the head numerous times to expel the water than was inside the head. THIS is VERY important to do so that mold doesn't accrue. Later than night i cut the pipe cleaner ends right above where i twisted the end pieces around each other ensuring that the straight ends were completely gone and the pipe cleaners would be easier to remove as i didn't have to un-twist all of the knotted ends of the pipe cleaners.

Here is what her curls looked like as i carefully removed the pipe cleaners from the hair by un-raveling each curl.


To me the resemblance is very close to two strand twists! I loved the unique and spunky curl pattern created! This time around the definition is very eye popping! A part of me wanted to just leave the style as is but figured HEY i want to achieve an afro so that Diva R could have a Barbie with a lovely full afro... So ill save the textured look for next time.

I decided my way of creating the afro would be to comb/brush it out. I began at the ends and slightly separated the curls so that the brushing would be easier. I held the Barbie in one hand and brushed the curls vigorously until i started to see the fro puffing out.... This was not as easy as it sounds (due to the texture and length of the hair) and using a comb was not a good idea either so i wouldn't recommend using a comb. Instead use a brush of some nature will give better results easier. Again no products are necessary in this creation.

Here is our beautiful fro-licious barbie <3


(The hair was straight as a board before with a slight coarseness to it)

I LOVE how cute and fluffy her beautiful fro turned out! I put a pony tail in at the very base of the head and finger fluffed the fro into its lovely roundness.
 

(SIDE NOTE: This experience also caused a casualty in a sense. I was trying to do too many things at once and the Barbies arms got a little heat burnt :( I think it was this barbie being of a different feel, because of her being the wet suit barbie with this coating over the arms and legs is what the root of the issue was in causing the shrinkage of the arms) Lesson learned- Multi tasking isn't always a great idea...

Good thing is that in our household things like that aren't even noticed in a negative light so i decided to just hand her to Diva R and say nothing, as things like that do NOT deem something as being unfit for play or an anomaly so to speak.  

Here are some more views of our newly vamped Barbie :) I ended up clipping a few random straggler hairs i seen throughout...


Diva R was so happy and thrilled to have a "fluffy" haired Barbie she tells me that she loves the Barbies so much that have beautiful natural hair in all their varieties. In her own words of course.  She didn't even notice the arms as being off key. This and her other two Natural Hair Barbies are her FAVS and they tend to always be around in the mix :)

This doll took me longer than the last two i did because of how tightly i had to wrap the twisted sections around each pipe cleaner making sure that i keep a steady amount of tension on each section so that the twist doesn't unravel as i was wrapping it. It took me an hour to do this ones head entirely.

Next i am on the search for some Barbie children so that i can make some natural kiddies for her... The kid Barbies seem to be her fav anyways... But their hair is always real short or in un-even layers so we will see what i can find :)

I love doing this and creating some natural divas for Diva R to play with as the normal straight hair Barbies just don't cut it for us because this isn't a strictly straight haired world :)

God Bless.

Diva R's Mommy-Kim

Friday, August 19, 2011

Swim Cap Review and Recap of Some Summer Fun!

To buy a swim cap or not?

I found myself not even thinking several months ago about buying a swim cap for Diva R. This idea had only popped into my head at the beginning of this summer. This is probably because 2 summers ago Diva R's hair was above her shoulders and didn't require any need for being covered or pulled up. As far as last years summer is concerned i just styled her hair to where it was in some sort of protective pony tailed or head banded updo and off we went. I never did the sun block in the hair thing because i just couldn't bring myself to over come my thoughts of sunblock and its greasy texture going into her hair let alone it running down into her eyes as she got her hair wet.

This passed summer i had seen many posts come across my Face Book page about swim caps and i fell curious and had to see what the hype was about.  While i was at Walmart i had stumbled upon an end cap of swim caps made by Ocean Pacific.


The above cap pictured is the only kind and type that the local Walmart sold. SO since this cap was under two dollars AND they had PINK which is Diva R's favorite color, without hesitation i threw it in the cart! If it didn't work out it wasn't a big burden on us anyways. Diva R was curious and wanted to try it out ASAP, at the BEACH she says. *)*

So off to the beach we went...


Before i applied the cap i spritzed her hair with distilled water generously but not to the point of making it drip wet. I Then applied our light natural moisturizer which is the Bee Mine Juicy Spritz. Lastly i rolled her hair into a high bun and pony tailed it off. 

Our Review

Color: Pink
Texture: Smooth and has a soft rubber texture
Cost: Under $2.00

The material of this cap after i opened it didn't feel like i expected it to. I expected the traditional hard to stretch rubber kind that fits really only one size head or smaller while under the label of being "one size fits all or most". This cap was deemed as being a child and adult size cap. There wasn't any descriptive information on the packaging at all nor could i find anything else about this cap online. I was then VERY surprised...
The cap stretched very easily across her head and was of a soft rubber like material. It didn't have the extreme pull like a 100% rubber cap would have. It sure did have the needed grip to it as i stretched it and softly put it over her hair. It stayed in place and fit nice and snug. Not too snug and it sure wasn't loose. Diva R i felt has a nice amount of hair to be successfully kept under a cap. Since it is so thin there is no battle with the cap at all.  

Diva R has wore this cap in our own pool, the beach, and spray parks. My first concern was i wonder if this cap would stay on with her going under water? So at the beach and the pool at home this hypothesis was put to test.  To my amazement the cap didn't budge! It stayed in the place that i put it exactly placed.  I would take her cap off and her hair would be completely un water logged and not touched by water!

I wondered if water being sprayed at or poured on could alter the swim caps position. So at the spray parks the cap also stayed put through random sprays, pours and the water slide. Ive read some reviews that the cap has actually come off or not been able to hold  lots of hair. Burt for us this cap proved to be well worth the investment and is a definite addition to our sun care hair regime. I feel that the importance of the swim cap is beyond thought now. This has been crucially important to us since this passed summer, on the extreme hot days we get this really helps me to be able to create a moisture barrier to where i am able to maintain Diva Rs moisture in her hair as the super hot sun beats down so fiercely and when the chlorine comes near or the beach water i was able to keep those harsh elements out of her hair!.  

Here is the Diva and her BF Diva S doing what they love to do most at the beach!!

 DIG!!!!!!!

The texture of the cap turned out to get a two thumbs up from us. Its not harsh and does not hurt the head or damage the hair at all. The cap fit Diva R's large head very well, the cap stuck true to its claim and it is a pass in our book overall &lt;3

Here are some random shots of things that we did this summer!


Hope everyone had an equally as blessed summer :)


Diva R's Mommy-Kim

Tuesday, August 16, 2011

We are Featured!!!!!!

Hey Fam! Please stop on by Natural-Hair-Info website and leave us some love! Dominique-Alexis has kindly asked to featured us and we couldn't resist! Our feature turned out lovely and as an incentive if you stop on by and check it out you get two sneak peeks of pictures i have not posted before!!!! One is OLD (hint: Unseen pic of baby/toddler Diva R) and one is a NEW :)

When we are asked to be featured i always custom make each feature posting because i like variety and who likes to see the same things being said and shown over and over again? Not us :) Not to mention it seems like things change in our household quite often anyways!

So PLEASE stop by Dominique-Alexis website and show us some <3!!!!!


P.s. We LOVE being featured so if YOU would like to feature us on your blog/website please email me loveyourgirlsbiracialcurls@yahoo.com. We also LOVE to feature as well, we are very open as to who we feature and the spotlight doesn't have to be hair related. Adults and children are always welcome here of all shades, textures, and sizes :)

God Bless all and have a blessed week!

Diva R's Mommy-Kim

Monday, August 15, 2011

Winner's Circle!!!! Cocoa Curlz Giveaway has concluded...


Without further a due our two winners have been chosen and are as follows...


1st place winner will receive the Cocoa Curlz Cutie Kit Trio Pack...


 The winner is.....
 Who said...
Congrats Brianna!! Please send me your mailing address so that Natalie can ship these right out <3


2nd Place Winner will receive a full size Butterfly Kisses Body Butter in 8oz and the Baby Boo Bubble Bath in 8oz size as well!

The winner is...

Who said...
Congrats Amanda!! Please send me your mailing address so Natalie can ship these right out <3


Thank you all for taking part in our blessed giveaway! It was wonderful having everyone on board and there will be many to come! In fact we have another one still going on right now!!! Be sure to check it out there will be plenty of giveaways in the future as well.

Thank you tremendously to Natalie for extending her amazing products onto us and our readers! Without her generosity this wouldn't have been possible! This was an amazing anniversary celebration and we appreciate all of the thoughtful comments and wishes we received <3 God Bless!

Diva R's Mommy-Kim

Sunday, August 14, 2011

Guest Article: Home Made All Natural Body Hair Wax Recipe and Tutorial

This is for adults obviously :) I was happy to receive a guest post offer of this nature because us women especially are always looking for a safer and more natural way to rid some of those pesky hairs! I will be trying this for sure, if anyone else does too please let me know how it pans out.


Lose hair the Turkish Way

When thinking about hair care, one normally thinks about methods to keep hair looking good and healthy.  However, as important as it is for hair on your head to look good, many women are equally concerned with not having hair on other parts of their body.

Below is a short Istanbul guide to traditional and natural hair removal wax that can be done at home. 

Waxing has been practiced and mastered in the Middle East and Turkey for thousands of years. Women make their own aÄŸda (sugaring paste) at home with a sugar and lemon mixture known abroad as sugaring. The traditional home-made wax is even edible. Back in the day, women would offer some of this paste to their kids as candy to distract and entertain them while they were busy epilating. It’s quite similar to padiÅŸah macunu (Sultan’s paste) both in taste and texture, which is a very traditional form of candy that can be found in spice shops.

The ingredients to make sugaring paste are sugar, lemon, and water, although the particular formulas vary as some choose to use white sugar instead of natural and some prefer to add lemon salt instead of lemon juice. Here is what you’ll need:
  • 2 cups of sugar
  • ¼ cups of lemon juice
  • ¼ cups of water

Put the ingredients in a bowl, and slowly bring to a boil over low heat, stirring continuously. The mixture will take a liquid form, and once it starts bubbling up, remove from the heat and let it cool for a few minutes. It’s imperative that you wait for the liquid to cool properly or you’ll burn yourself. Then, pour the golden-colored mixture on a wet surface. Make sure that the surface is made of marble or stone so that the mixture doesn’t stick. Here is the more difficult bit: you need to work the mixture in your hands until it becomes easy to smooth on the skin (this may require a few practice runs for the novice). After the paste reaches the right consistency, either apply the paste on the desired area with your hands (it should not stick to your hands) or store in a microwaveable container for later use (you’ll need to reheat the paste to a lukewarm temperature for future application). 

Spread the paste on your skin (either with a spatula or your hands) in the direction of hair growth and rip it off (with your hands or using strips of cotton cloth) in the opposite direction. Do this quickly with the flick of a wrist for minimal pain.

The procedure may sound a bit complicated and time-consuming, but sugaring is known to be less painful than waxing as the paste doesn’t stick to the skin, so it would be worth your time and effort.

Go beyond what you think of as Istanbul tourism (and hair care) by trying out sugaring. 

Author: Talya Arditi is editor at the Guide Istanbul - a sharp, sophisticated, and trustworthy filter to Istanbul Tourism, offering comprehensive listings of restaurants, bars, hotels, and more