Showing posts with label Baby Hairs. Show all posts

Sunday, January 1, 2012

New Years Hairstyle-Cornrows and Natural Curls With Jazz

Happy New Years!!!!

It is so great to be able to see a brand new year and to be able to look back on all the accomplishments that we have made as a family.  This New years we rang it in as last year with our Church as we feel there is no better way than to be in the house of God and celebrate the New Year in HIS name and with our fellow church family members and friends. We aren't into the party scene and finding sitters to go out and do tasteless things and this we feel by not doing so is also a great bonding opportunity as well as positive influence on our children and their future decisions. 

So as far as the hairstyle element is concerned i decided i wanted to start experimenting with some forward facing cornrows and some styles like Mimi Braids does :) So as a beginning step towards that i decided to do a front section of her hair in 4 forward facing cornrows into a twist and clipped off to the side.


This style is very self explanatory BUT some detail i feel is necessary... Diva R has stubborn baby hairs that are ever growing so i thought that by doing cornrow styles this way would help to tie in the baby hairs around the edges producing a cleaner looking style.  So it turned out great and i was very pleased with the resulting product. I noticed by comparing pictures my cornrowing is getting better and better :) Yay me!!!!


If you follow the above picture detail by detail you can see how it was accomplished.  I used Bee Mine Curly Butter, Shea Moisture Mist and our distilled water spritz interchangeably.  The beads i used are the "chubbie" beads which are the size in between the small pony beads and large barrell beads. 


I left the other parts of her hair down and in its natural state, which i finger combed some Curly Butter throughout.


 My Diva's new hair time activity is her Leap Frog Leapster 2 which she LOVES. This is a toy that we use solely in times like this or times where there are long waits and no room for play or much talking. I feel electronic toys can be abused easily so moderation is the key when these come out in our house :)


(such the SERIOUS Diva!) Playing her Pet Pals game <3


I adorned her style with the cutesy butterfly we got from Cherished Custom Creations by Rebecca Lopez which also helped to hold the bundle of NOW braided together frontal cornrows back out of her face.

This was a new style for us and it turned out to be super cute, easy to do and versatile as well. All in all it took about 20 minutes to complete and off to church we went <3


Diva R's Mommy-Kim

Wednesday, December 14, 2011

Freestyle Bantu Knot and Cornrow Style

The day of the week came along which is one of the days that the kids look forward to each week. Playtime at Gymboree!!! So with this being said i knew i had to do something functional, cute, durable and easily changeable/fixable.  Its inevitable that when ever we go there her hair seems to be tested LOL

So since i haven't done Bantu Knots in a bit i figured that i would incorporate them into our desired style idea. Her hair was freshly washed and conditioned prior to styling so i let her hair dry for about 15 minutes before beginning, allowing her curls to dry a bit yet still remaining damp. 

I gathered our distilled water spritz, Curly Butter and Shea Moisture Mist along side our plastic rat tail comb, wide tooth comb, rubber bands, and pony tails.  I began by spritzing her hair with the Shea Moisture Mist generously from root to tip and then i started parting out the top 4 square shaped sections.


I applied some curly butter to each section as i parted and rubber banded and pony tailed those 4 sections off individually to keep them out of the way so i can work on the back.  Then i parted two sections on the right side of her head, applied Curly Butter and made two cornrows in an angled fashion going downwards. I rubber banded those off at the ends and then repeated for the opposing side of the back section, creating a total of 4 cornrows evenly on the sides of her head.


The hair left in the middle i decided to split in two sections, an upper and a lower, then i applied some Curly Butter and pony tailed each off individually. Now i have a total of 6 parted box parts which i then braided each boxed section individually into one big braid and constructed a Bantu Knot from each. 


I secured each knot with a single rubber band and a pony tail per each section. They were coiled tightly around themselves so that the braids would stay wrapped in place. Then i rubber banded the 4 hanging braids together underneath the last Bantu Knot in the back creating a pony tail.


I topped it off with a few sprays of our Shea Moisture Mist to add some shine and a final layer of moisture.


I just combed her remaining baby hairs downwards and they stayed in place as is nice and neat <3


This style was completed in 45 minutes and i was able to keep this style in for a few days with minor changes. It was a huge hit as we got to Gymboree, everyone always loves her hair styles and another great thing is that they let me promote my blog there as well. This style got many looks all day long.


Even though its cold here we still manage to keep the bright summery colors alive and well all year round emphasizing summers never ending spirit.  Who says that you have to wear dark and warm colors for fall?

God Bless.

Diva R's Mommy-Kim

Tuesday, December 13, 2011

Three Strand Twist Up-Do With Ponytail Style

Three Strand Twist Up-Do Style With a Pony Tail

The name pretty much sums it up, i was going for something new cute and girly. I had also started making bows from time to time and was quite proud of my first complex bow as i liked to call it.  I decided that i would begin with coating her hair generously with distilled water since it was dry prior to styling.

Then i parted a side part from her forehead back until i reached the point behind her ear then i parted a straight line across the top of her head until i reached the same spot on the opposite side of her head behind her ear.


I spritzed a little bit of our Juicy Spritz throughout her hair and then applied some Bee Mine Luscious Balanced Cream Moisturizer to each formed section individually to help slick her hair smoothly into the rubber bands and seal in the moisture already applied.  I rubber banded the top sections i created and smoothed out the back section with a tad more Luscious Cream and then i constructed three strand twists from each of the two sections formed which i put into a pony tail with the back section.

  
When the pony tail was complete i spritzed a little more distilled water on her curls hanging from the pony tail to liven them up and so i could finger separate her curls for more bounce and volume. (The bow pictured i created and now Diva R LOVES when i make her bows <3)

The twists stayed very well in place and didn't unravel as they normally would being freely hanging this was a simple and quick style which is suitable for girls of all ages and easy enough for beginners to grasp with no prior knowledge.


I left her baby hairs just laying down in their normal fashion of choice that day which really complimented her style and all in all this style was complete in 15 minutes. Added the bow and was finished. Another great aspect is that this style lasted for a few days with minimal frizz and by simply changing the bow to match her daily outfit, I dressed up the style making it look new :)


 I am a sucker for side parts and pony tails. Trying new things is something that we make an active element in our household as this consistently expands our horizons and helps to keep optimistic tones as well.  

Diva R's Mommy-Kim

Friday, October 7, 2011

Back To School Hair Style Day 5

Wheew day 5 came too soon! So it was time for a LONG deep condition treatment and lots of heavy moisturizing over the weekend before her 5th day came about.  This was important because her hair was kept in different styles over the last 4 days. Today she wore her black and white busy printed girly tunic shirt with matching capris.


There isn't much to this style, my goal was to do something quick and something that kept her hair out of her face. Today it was hotter than usual for a normal fall day so this inspired this tradition style.  I prepped her hair first with our distilled water spritz generously and then i applied a few sprays of our Bee Mine Juicy Spritz.  I really didn't have an idea in mind for a style so i just started parting and as i went i was applying dabs of our Original Moxie Just Gel mixed with Darcys Botanicals Vanilla Madagascar.


I was aiming for something quick so perfection wasn't the key. I still love how the style turned out and complemented her long baby hairs... This type of style always provides a nice braid out.


 This style took an hour and a half and i left it in for a few days and then Diva R rocked the braid out for a day and we washed and deep conditioned her hair... The 2nd day i pony tailed the back for a switch up.

Diva R's Mommy-Kim

Saturday, October 1, 2011

Back To School Hair Style Day 1

School has begun so i will be showcasing Diva R's first 6 days of school styles one by one.  For her first day of school i wanted to do something girly, simple, cute and designed. I always let her pick out her school outfit and she takes great pride in this, my only requirement is that is has to be one of two that i show her and the whole outfit has to match :)  She chose one of her new Pink Akademik's outfits. So with this i just free styled a style the night before and here is how it turned out...


I shampooed and conditioned her hair with our trusty Bee Mine Botanical Shampoo and Bee Mine Deep Conditioner. Then i spritzed our lovely distilled water lightly over her hair squeezing it in by hand. I then put some Bee Mine Curly Butter on her mids through ends and finger combed it in. My first part was from just above the ear across her head ending right above her other ear creating a top and bottom half.  I began on the bottom half and as i went i dabbed a bit of Curly Butter on each section as i cornrowed and just let my hands create. I ended up with an x shape in the middle and a few regular cornrows.


Then i adorned the ends with each a three inch and two inch Sidewinders mixed together for a new and fun look! Ive yet to see this done anywhere yet ^_^ I LOVE the different look of the combined Sidewinders! I then split the top section of hair in two even parts straight down the middle and clipped the right section off so then i could part out a tapered section from the back of her head to the front and create a forward facing cornrow. I did this on each side and adorned those with coordinating Sidewinders <3

With the remaining hair on each side i created piggy tails and finger curled her loose hair into two separate sections on each side.


I put most of her baby hairs into the piggy tails and slicked them into them the best i could using some Curly Butter. I combed the little remaining hairs downward and they fell right into place. Finally i topped it off with our Juicy Spritz and off to school she went.


 I wonder if the Diva will ever grow out of her baby hairs? Hmm

This style took about an hour and 15 minutes tops.

Diva R is still in LOVE with PINK, so this will probably be a staple color in our regime for a while.

Diva R's Mommy-Kim

Friday, July 29, 2011

Combinaton 4-1 Style with Natural Curls, Braids, Sidewinder's, Ponytails, Braid-out, and Cornrows

Quick, Easy and Lovely! Natural hair is incredibly versatile in styling and combination styles can be easily created and easily altered each day creating a different and still equally as cute if not cuter style.  I am one for showcasing Diva R's natural curls consistently. She loves wearing her hair down just as much as she does styled. I think my teachings and embracings have paid off already at her tender age of 4!

So my idea was to create a style which kept the top front portion of her hair free from hanging in her face, this is the area where she sweats heavily from and since its SO HUMID here i (for complaints from the Diva's sake) thought of re-creating an oldie but goodie of ours...

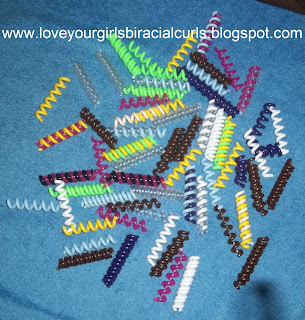
I began with the thought being "Hey" its been a while since i have used the Sidewinder's so i had to bring em back out! As these are just amazing and so much easier applying to the hair than beads.  I used some of our 2 inch Sidewinder's in my choice of coordinating colors.  

Part 1

Before i begin parting i spritzed Diva R's hair moderately with our trusty distilled water in our lovely pink bottle from scalp to tip. I lift her hair up as i spritz to guarantee an adequate coverage throughout.  I then misted her hair with our Bee Mine Juicy Spritz acting as our light moisturizer and finger detangled the few knots that she did have while also smoothing the moisturizer into the already in place distilled water for our wonderful moisturizing method.  


I chose our Darcy's Botanical's Madagascar Vanilla Styling Cream as our styling/hold product. I applied this to her ends generously and then began parting. Its really a no brainer as to how i did this style BUT i will explain in case someone would desire i do so. 


I grabbed my trusty rat tail comb and parted ear to ear (just behind her ears) across the top of her head. Then i just split the top section of her hair in three sections, pony-tailed and singled braided each.

I ended each braid into one of the hair holders and a small pony bead. I opted out of the rubber bands for a little while to see how we like these orthodontic bands in place of them, and secured the bead on so the SW doesn't slide off (helped to provide a light ending weight on the hair holders). 

I &lt;3 our Sidewinders, I'd say my favorite size is the 2 inch because of Diva R's thinner type hair i like to usually put a smaller amount of beads on her hair per strand to prevent extra weight hanging off of her hair. 


These are still better than beads currently for us and we have used them quite often since i bought her very first set ages ago :)!

This style took all of 20 min tops from start to finish. I topped it off with our Juicy Spritz and we were off.

Now for Part 2

Tuesday, June 28, 2011

The Faux Hawk Strikes Again!!!

 The hawk lands again!!! Honestly from the beginning of my seeing these faux hawks i wasn't really impressed... Especially on boys i really wasn't digging them. BUT Ive fell head over heels for them and find myself experimenting with all ways of doing them...


I'm happy to notice that as i do the hawks they get better each time!YAY So pre-product wise i used our trusty Bee Mine Botanical Shampoo and Mixed Chicks Leave-In. I had an idea of how i wanted the hawk to look so i left Diva R's hair damp as i started parting for ease and minimal tangling, i was also spritzing the Bee Mine Juicy Spritz as i went too so that moisture could be soaking in prior to being braided and parted in efforts to protect her scalp throughout and the hair near her scalp. I used Bee Mine Bee Hold Curly Butter for the hold product and this is my number 1 fav product ever!

I also kept the distilled water spritz near in case her ends start tangling or drying as i am cornrowing... Which i must say her hair is becoming more tangle prone as she grows.

So i just started parting up and out in like a half sun type pattern and chose to left her natural curlees hanging free. I had cornrowed with the thought in mind of the free hair being swept over to her right side because i love the elegant half and half look.

I did end up putting beads on the front two ends of the cornrows just didn't take pics, i changed them up every other day to coordinate with her outfits :) I honestly couldn't braid the front pieces upwards  i tried and tried and the baby hairs are so stubborn they seriously refuse to cooperate and lay a certain way no matter what i do. BUT we made it work and she loves beads so we both won with this style.
These are her natural curls!!! I get asked all the time how i curl her hair and what i use to do it and i chuckle each time because they are natural and i have to do nothing to "create" them.  Below is a picture of the back view with a hint of the CB and JS respectively.


This has become a staple style in our book! and it is the most requested style from parents for me to do on their little Diva's and Big Diva's.

Diva R's Mommy-Kim

Sunday, June 26, 2011

Father's Day Style Recap :)


So i decided to whip out the slide braids again :) and for Father's Day which was also on a Sunday this year i decided to do something ultra girly cute and to coordinate it with... Diva R loves wearing dresses she is the girly girl so she gets to wear them alot! This style was inspired by her canary yellow halter top dress.

It was quick simple and took all of 20 minutes from beginning to end. I used the Bee Mine Juicy Spritz along side the Lavish Curls Moisturizer topped off with our cherished Bee Mine Curly Butter.

The slide braids have become a cute addition to our styling regime, they are adorable and people always try and figure them out after they oogle over them :) and they are so easy even a Daddy can do them!


 Diva R has some of the most healthy vibrant curls i have seen. I see alot of biracial children on a regular and almost ONE of their parents do anything to care for their children's hair and that explains the ratty-looking-ness of it :( Poor children, there is no excuse for laziness parents!

This Father's Day was a blessed one as usual, it was all about Daddy and we hung out all day long and spent time with the fam as well.

In case your wondering these lovely flowers came from Tiffany's blessed hands over at Diva Locks (Diva Do's & Everything in Between)

I LOVE easy styles! Keep in mind this blog is for everyone of every hair type, you don't have to be biracial or have biracial children because you will gain consistently from LYGBC i promise that!!!

God Bless.

Diva R + Little Bro Z's Mommy-Kim

Tuesday, May 31, 2011

Three Strand Twist's/Half Cornrow's With Heart Beads

This is a Curlee switch up from the previous style i shared that lasted 8 days. I decided to change up the three sectioned pony tails that i had on the top half of Diva R's hair. Instead of the finger curls that she wore previously. I did three strand twists , twisting the 3 strand together going to the left because i found that one thing i was having trouble with was that i wasn't thinking about twisting with her curl pattern i was just twisting in what ever direction came to mind and that is what contributed to the twists unraveling very quickly. YAY i love learning new things!


No matter how tight i do the twists or how loose i do them they always end up unwinding slightly looking puffy yet cute :)

As you can see the beads were turned into black and white heart beads as mentioned in the last post  :)

Below is a close up of one of her 3 strand twists and i am beyond surprised how long they lasted! NO twist has ever stayed in Diva R's hair longer than an hour. these lasted for several hours! YAY its a start.


I used the Bee Mine Curly Butter to create the twists and finger twirl the ends.

Below is another side view of her twists :)


I am definitely happy with the results and will try these more often in different ways in the future. Twists have always been easy for me to do but they just never stay in fine hair.


Diva R's Mommy- Kim

Sunday, May 29, 2011

Freestyle Cornrow's, Beads and Pony Tails

This is the style half done :) Diva R's hair was washed conditioned and moisturized the night before as well as moisturized again the afternoon of.

Shamp: Bee Mine Botanical Wash
Leave In Conditioner: Mixed Chicks Leave In
Moisturizer: Bee Mine Juicy Spritz


I just parted her hair from ear to ear and just freestyled a bit ending the braids in translucent flower beads from Curly Princess Hair Boutique and some other translucent multi color beads i got locally. I used the Bee Mine Curly Butter to cornrow with for light yet great hold.
I didn't take pics of the full style with those beads pictured above for some reason LOL So what i did was just split her hair in three diagonal sections and put matching ballies and let her finger curls hang loose :)

Below are pictures from a few days after having the translucent beads in... I decided to do a switch up with beads and ballies to match another set of outfits. 

Here is the complete switch up style :)


I used the Bee Mine Juicy Spritz as the moisturizer of choice during the non washing days of wearing this style. I did use a slight bit of the Curly Butter as i was finger twirling. As i was switching out the beads from the first style to the second style switch up i generously coated her hair with our distilled water spritz, followed by a light drizzle of the Juicy Spritz and followed up by the Curly Butter nice coating the ends especially that have been wrapped in a rubber band for days prior to.

Nothing to it :) Cute and easy to switch up and it took about an hour or so to complete :)

I was just going for something different and girly yet with angled cornrows half done and it worked for us! So it lasted about 8 days!! Amazing as that sounds some were fuzzy for sure and it was clear they needed to be taken down BUT she INSISTED they stay in LOL

I ended up changing it AGAIN throughout these 8 days, for a little different variation including twists :)

Diva R's Mommy- Kim

Tuesday, May 24, 2011

Way Back Wednesday Style Reflection

This WBW Reflection was created in thought of cute short hair styles for Diva's of all young ages *_*

Back in the beginning of our hair time adventure the one thing i knew how to do off bat was pig tails with the single braid coming down from each side. I seriously don't remember back at this time using any special products at all i know i had that kids hair lotion on hand ...


I just loved how her piggy tails kind of pointed out wards when i left em freely hanging :P This was such a cute and easy spunky style it was duplicated many many times. I would switch out the pony tails/ballies to match with each outfit and it was a completed style in less than 10 minutes.  Her baby hairs had a mind of their own and i would just let em do their thing :)

This was taken 3 summers ago and i must say i <3 it!! It kind of reminds me of Snoop Dogg's hair years ago lol with his little piggy tail braids sticking out with a curve to them LOL

Here is a baby hair view  and an idea of what her hair looked like a few hours after playing, going to the circus and having an all out field day.


These were oldies but goodies and please excuse the lesser quality pics above, they were magnified and taken from an old camera.

I loved doing Little Diva's hair and at this time i had such an interest in learning how to do something more fancy with her hair. I tried and failed tried and failed and just stuck to the all over pony tail designs, pig tails, pony tails/side ponies and a head band from time to time.  Her hair was so super fine at this young ripe age of 2 so not alot would keep in her hair.

<3 The stubborn baby hairs with all my heart i just wish they'd make their minds up LOL

What types of styles did you do for your child when they were 2?

Diva R's Mommy- Kim

Tuesday, May 17, 2011

Way Back Wednesday Style Reflection

This is a square sectioned piggy back pony tails design with a half pony tail in the back.  This style really highlights her baby hairs that were nearly even at this time! It was done last November and classifies as a Simple and Quick style and it was a school doo also :) The goal for all school doo's was to keep her hair out of her face and away from potential cutting harm!


I split the ending hair from the pony tail in two pieces, i then braided the right piece of hair in a single braid. The the other grouping of hair i left un-braided and then braided those two together into one bigger braid and ended it in a ballie for a little added weight so her braid would curl up :)

Lets Jam Extra Hold Gel was my poison of choice back when.

No explanation needed for this style it is simple, cute and is achievable in 20 minutes!


What type of pony tail holders does everyone use?? Have you had any bad experiences with any?

Diva R's Mommy- Kim

Friday, May 13, 2011

Simple and Quick Side Ponytail with Jazz

Here is a Simple and Quick cutesy girly style that is suitable for younger and older girls :)  Just used our regular products Bee Mine Botanical Shampoo and the Mixed Chicks Leave In followed by some Curls Lavish Moisturizer.


I first made two box braids in the front then I just "slicked" her hair back to the side with my hands and rubber banded, then pony-tailed the hair. 

I made one thick braid and secured it with a rubber band and then finger-coiled the remainder of hair.


I added a super cute bow that a friend of mine made for Diva R... Combed down her baby hairs, added small pony beads and a shell at the end of each box braid. Now these shells are new additions to our collection as of Easter :) We got these from Curly Princess Hair Boutique, and we have never used shells before but i have always wanted to try some and these are the cutest shells i have found! So we were excited to try em out :)


At first glance i was like wow how am i going to put these in her hair!?! But then i got the idea of using them as i did (pictured below) as the ending "bead"...


This was just a WONDERFUL idea if i do say so I just wrapped the hair at the end of the single braid around the shell just like i would a coordinating bead at the end. Then rubber banded it spiraling up as i went... There you have it, i was super proud of these and Amanda from Curly Princess Hair Boutique always has the coolest, unique, cutest, girliest,  different, one of a kind beads and accessories <3 These shells have a shiny pearl sheen to them and we got them in Pearl Multi Color. I just loaded them on the beader and slid them on just like beads would slide on via a beader. I think I'm in <3...

There is nothing much to demonstrate with this style, it is a simple and quick style that can be done in 10 minutes tops and with added accessories ANY pony tail can be transformed :) This is achievable in ALL hair types :)

Diva R's Mommy- Kim