Showing posts with label Heart Parting. Show all posts

Saturday, June 2, 2012

St. Patrick's Day Hairstyles 2012 LYGBC Style

Happy belated St. Patrick's Day <3 We've been consumed in many things lately and Im now beginning to catch up on blogging.  My husband and I have recently welcomed our newborn son Baby G into our family in April and ever since just before that we've been on overload.  So without further adue i will begin posting again from more of an inspirational stance for a while.

For St. Patricks Day i did 3 consecutive styles which i created from my own thoughts and ideas. The first one is super obvious and easy i just posted it to show the super cute pot of gold hair ties i got from target for 1.00 each :) Its a simple pony tail style where i split the hair in two and pony tailed the top half and then the bottom half separately. I opted for single braids from each pony and finger twirled her ends. I used Kinky Curly Knot Today Leave In which we have been experimenting with for some time now and is one of the newer products that has been added to our collection (Review Coming... Stay Tuned)... I used the KCKT as a slicker/hold product.


This style took all of 15 minutes to create and is one that can be altered into several varying styles over multiple days.

The second style i created was a 3 leaf clover and natural curls doo where i added a little festive flair to the style by creating a 3 leaf clover via triple heart shape parting and a joining single braid forming the stem. Originally i had no idea what i was wanting to do and i couldnt find much inspiration that was unique so i just let my hands go and i ended up with this...


The first thing i did was i began styling with my Diva's hair being wet and detangled alongside application of some of our usual products. I had found a mid point at the top of her head where i began parting the first heart shape. Then i parted two like heart shapes on the sides of the center heart at an angle so that it would come together like a clover when finished. I then rubberbanded each heart off individually and then hit a road block... What will i do with the end pieces?
I decided to go with the first idea in mind (which better ideas came there after) and i just gathered the three groupings and braided them together in one big braid which did end up forming a stem and i pony tailed it off.
After i formed the 3 leaf clover i decided to let the remainder of her hair hang free and concluded it with some scrunches of Kinky Curly. Below is a close up of the clover...
All in all this style took about 40 minutes (mostly due to the parting)... BUT it lasted very nicely for several days with minor touch ups.

Here is the third style which i decided to keep the in place clover in BUT i added some variation... I cornrowed the two front parts of her hair and the remaining loose hair from the previous style back into a pony tail which i also gathered the three groupings from the clover into.
Then i braided a big braid including all of the hair pulled back and adorned it with a few clover rings that we got from St. Patty's Day cup cakes at Kroger and a FAB St. Patty's Leprachaun bow that we got from Cute N Curly Bowtique.

This style is super cute and my fav of the three that i did, it got many raves at school as this was her school party style :) It took about 30 minutes to change this style up from the previous style. 

Hope you enjoyed our St. Patrick's Day styles and may these be inspirational for years to come <3

God Bless.

Diva R's Mommy-Kim


Saturday, February 18, 2012

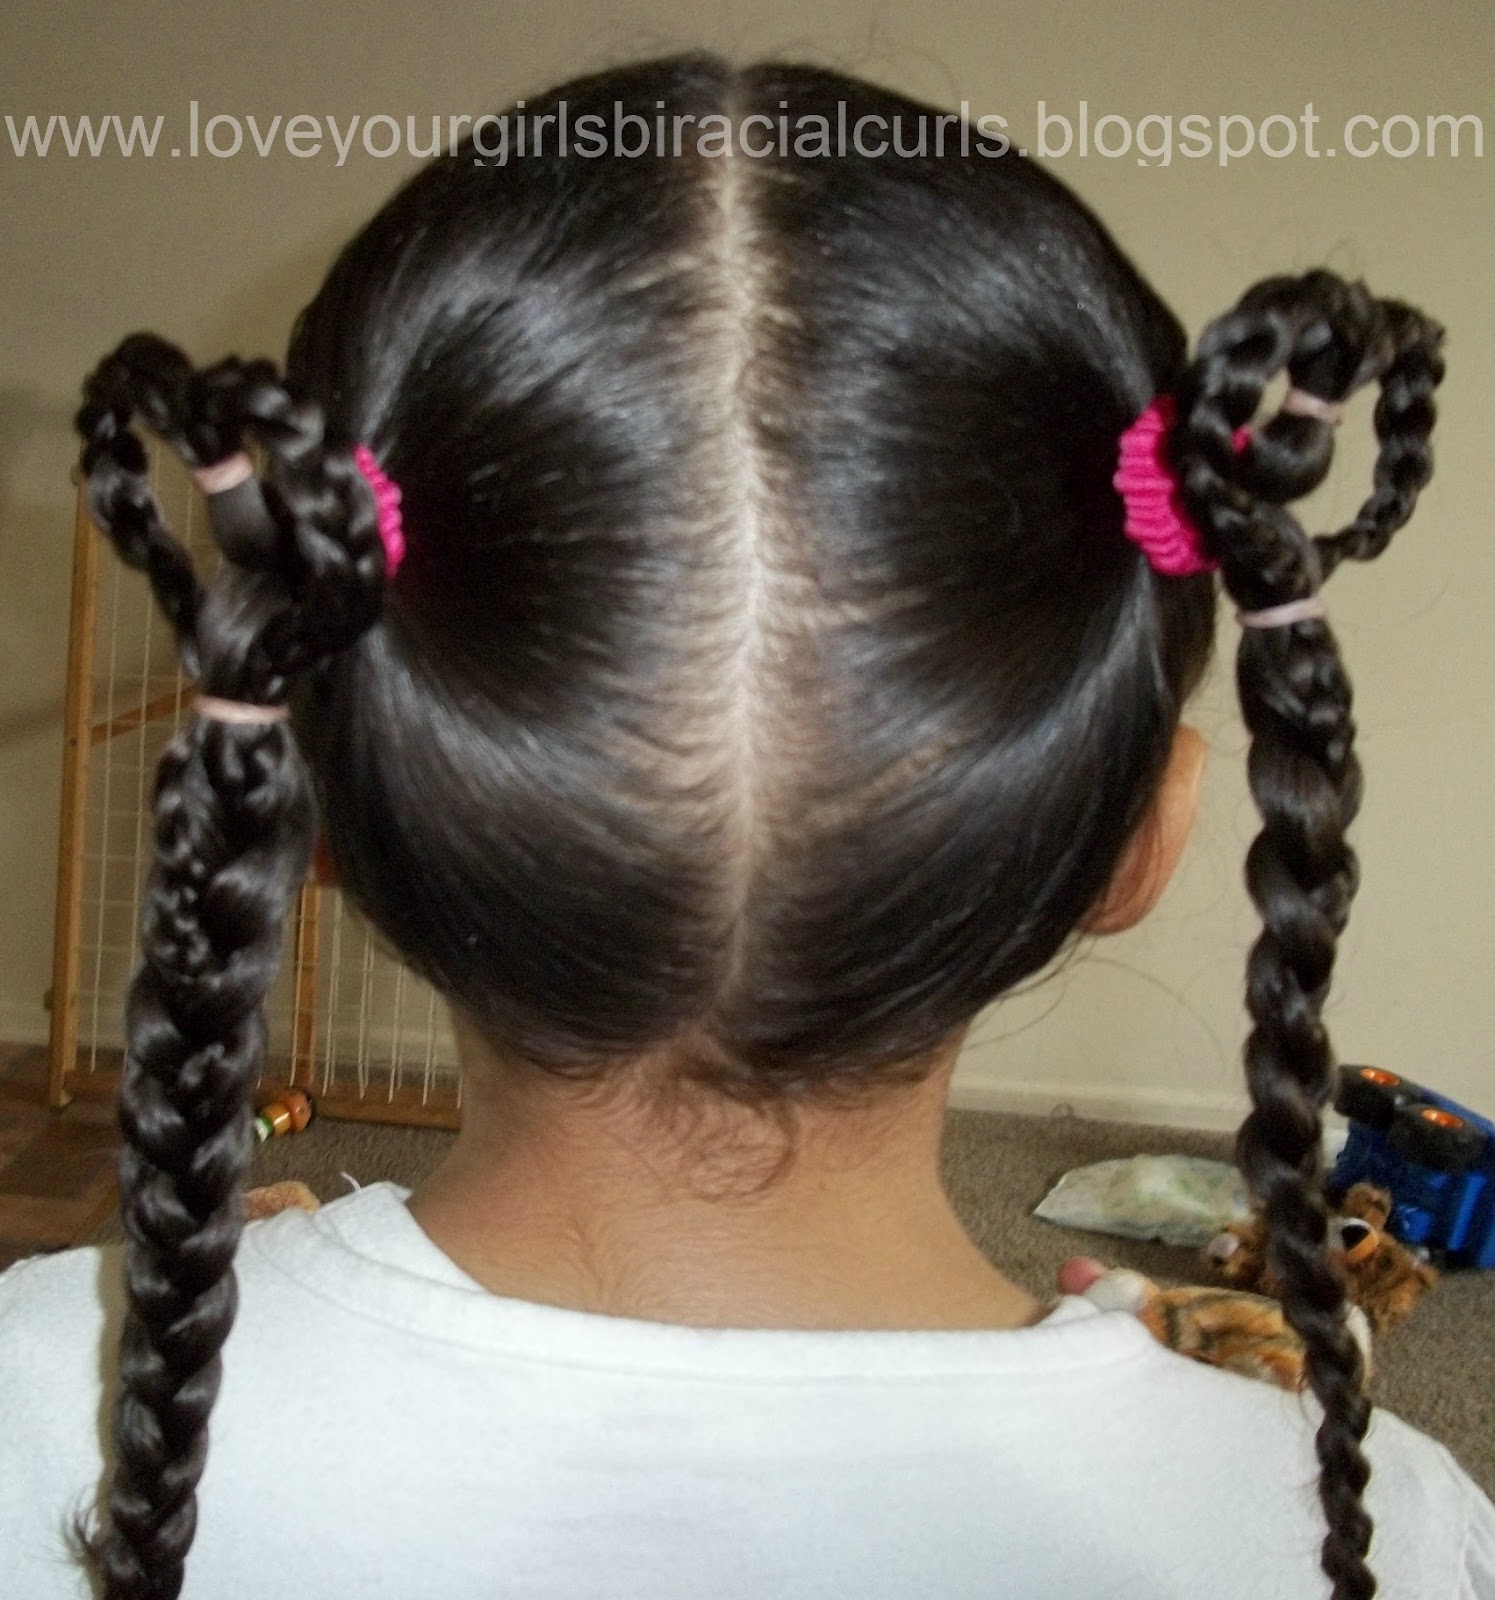
Pig Tail's with Braided Heart's

This style was yet another Valentine's Day hairstyle which i felt the heart was necessary to incorporate into :) The pig tails with braided hearts style was a spawn style off of my previous Valentine pony tail with braided heart style. I decided to double the pony tail, create pig tails instead and construct them with hearts &lt;3


I used some distilled water spritz followed by finger dabs of our Pretty Curls Whipped Hair Butter and topped it off with our Bee Mine Juicy Spritz ...


This style is very self explanatory and from beginning to end the style took 20 minutes to complete making this a simple and quick cute hair style for little Diva's.

Diva R's Mommy- Kim

Tuesday, February 14, 2012

Valentine's Day Topsy Tail Created Heart and Natural Curls Combination Hairstyle

Happy Valentine's Day everyone!!!  Here is yet another Valentine's Day hairstyle for the fellow Divas out there &lt;3 I had already posted this one on our Face Book page and i had received the idea from one of the fellow amazing hair blogs i just forget which one(s) so if YOU have done this prior too i will gladly mention with credit <3


This style is "Topsy Tail" created and it begins with a half pony tail. After i pony tailed half of her hair i split the section into two even parts and i braided them individually creating two braids from the pony tail as shown below...


This is where the Topsy Tail tool comes into play... I do not know if there are modern versions of these as i have not seen any. This is one I've had since i was young that i had found un used in my misc boxes of things.  I figured i would get it out and start playing with it!


Then i put the two braids through the hole on the Topsy Tail and centered the pick end underneath her pony tail and pushed the braids up through the pony tail to where they were then in a "water-fall" fashion one on the left and one on the right.  I had two bobby pins handy and i molded each braid into a left and right forming a heart between the two and i used 1 bobby pin on each side to hold the heart in place. Then i rubber banded the two ends together as pictured below...


Here is a close up of the braided heart <3


I was going to leave her hair just like that with no addition but i decided that since i had so much hair in the top pony tail it thinned out her bottom section so i decided i would pony tail it with the top section remainder and adorn it with one of our new Valentine bows from Cute N Curly Bowtique <3


I used our distilled water spritz, Darcy's Botanical's Curl Styling Cream and Pure Jojoba Oil (which i will be reviewing shortly)...


The Jojoba Oil i used lastly as a sealer and moisture retainer and i used just over a nickel size amount along side a few spritzes of distilled water for dilution.

These are the bows we were blessed with for Valentines Day <3 <3 <3


This style was simple and quick and its super easy, no skill needed. This one is one of my favorite hairstyles that we did this year as of yet.

Diva R's Mommy-Kim

Saturday, February 11, 2012

Valentine's Pony Tail With Braided Heart

We are counting the days down until Valentine's Day and have still a few styles under our belt to unveil <3  This style is an inspired one which came to me via Princess Piggies and i added my own twist to it as i usually do. The style original name is the "Heart Topper" so instead of twisting/rolling the hair into its heart formed topper i braided it as i knew that her hair wouldn't stand through otherwise.


This style is super easy and simple and quick, it looks lightly more complicated than it really is. I gathered our distilled water spritz bottle, Bee Mine Luscious Balanced Cream Moisturizer, and the Bee Mine Juicy Spritz. Tool/Accessory wise i had my rat tail comb present, 2 rubber bands and 1 pony tail.  I always begin first with my distilled water spritz i use this faithfully as our pre-moisture moisturizer. I pulled her hair back into a pony tail and as i did so i was slicking in some Luscious to help hold back the frizzies, the shorter baby hairs and to add in a thicker moisturizer that usually stays put and does what it it supposed to throughout a full day style.  I love not having to reapply moisturizers more than 1 time total in a day. <3


After i smoothed out the pony tail at the back center of her head i took the rat tail comb and sectioned about a half inch's worth off the top of the pony tailed hair. (This is the part that i will be constructing the heart from).  I then placed a rubber band about just bigger than a half inch around that small section i just parted. I then split that section i just rubber banded, into two even sections presenting a right and a left. I clipped off the big grouping of remainder hair to keep it out of the way and i braided each of the two designated sections for constructing the heart into single braids. I removed the clip i had on the big section and at this point most of the frame work is done. I then molded the desired heart shape with my fingers and rubber banded the ending braided strands with the free section of hair.  Finally i braided the remaining grouped section into a regular three strand braid, securing the end with a rubber band and topping it off with some Juicy Spritz, we were set!


This style took about 20 minutes tops and was so fun and easy to do.


People really seen to flock to my Diva's holiday/event themed styles, not to mention how much i really enjoy creating and re-vamping new and unique styles making hair time even more special!

Diva R's Mommy-Kim

Friday, February 10, 2012

Valentine's Heart Hairstyle For Girls Version 2

Heart Heaven is where we have been lately :) I've been surfing the net and concocting some ideas for some Valentines hair styles and i decided on doing heart themed styles for the rest of this month and then i will be on to some St. Patty's Day styles...


I had promised that i would post the re-vamped version of my most recent heart hairstyle and without further a due here it is!


So as you can see the style nearly stayed the same with a few tweaks and additions. I figured that i would add two additional pony tails instead of the one side pony tail now totalling 3 pony tails. I also re-did the 2 strand rope twists stemming from the heart and i added more rope twists to the other two pony tails totalling 6 rope twists.


We were itching to use some of our Sidewinders and we chose the brown and pink 3 inch Hair Holders to adorn the rope twists with.  I picked out a cute matching outfit and a misted a few spritz's of Shea Moisture Mist and we were revamped into a whole new style just that fast.


All in all this transformation style took 15 minutes and i plan on it lasting a few more days :)


The Diva really loved her festive style and the Sidewinders are one of her staple accessories as it is so she was really in Diva mode. I am beginning to fall in LOVE with these rope twists they have seriously been working for us and lasting as long as needed as well. They haven't lasted through the night though but lasting all day is a plus in our book for sure because twists have never been long lasting or even possible in her hair until now and still only rope twists are working.  


Here is an idea of what her rope twists look like after i unraveled them. Her hair seriously looks "loc'd" up. I like the cute fun spiral looking loc imitators :) Too bad i cant further unravel them without them losing their spiral look.


This is a simple to follow style and most of the styles i create are created in random freestyle way anyways, i usually create as i go with no format which would make tutorials hours long  and some what needless. * If you always start with your focal point of the style and work around it you will achieve the same style or create your own version like i did, having the heart as my focal point i just simply created around it.*


God Bless and Happy Pre-Valentine's Day <3


Diva R's Mommy-Kim

Wednesday, February 8, 2012

Valentine's Heart Hairstyle For Girls

I have been busy busy busy trying to create new styles and re-inventing some new styles that i came across.  Since it is nearly Valentine's Day i knew i had to do some styles with hearts in them :)  I had got inspired to do this hair style when i seen a recent Valentine's Style by Goldi Locks N-Me. 

I used distilled water spritz, Bee Mine Luscious Balanced Cream Moisturizer and our Shea Moisture Mist respectively.  I first began by parting the heart in the spot that i wanted it to be in. Next i created the bottom side cornrow and followed that up with the cornrow from the top of the head shaping around the heart and finishing at the top of her ear. 


Then i smoothed out the heart and rubber banded it off. Then i created two, two strand rope twists from the heart and added some big pink flower clips that we got form Curly Princess Hair Boutique.  I decided to merge the two cornrows at the point of her ear and then added them into a side pony tail which i created next...


From the pony tail on the back lower side of her head i decided to add a pink heart ballie and then i created three more two strand rope twists which i ended with more pink flower clips :) I use rubber bands underneath the clips because the clips themselves can not hold in place any other way.


I love the popping effect of the rope twists versus the two strand twists :)

This is the first Valentine's style that we have done this year and to see some of what we have done in the past for Valentine's please reflect here and here for some awesome unique styles for your princess &lt;3

This style took about 35 minutes or so and stay tuned for a revamped version of it and a few more styles Valentines inspired.

God Bless.

Diva R's Mommy-Kim

Sunday, January 1, 2012

Ponytails With Cornrows Final Switch Up Style

This post is quite obvious and doesn't need much explanation. This is the third and final part to the several day style that Diva R has had in and it begun on Christmas Eve and ended days later with this being the final doo :)

I just re did the cornrows in the back and added some new flare to match her current outfit and whah-lah it was a simple under 10 minutes switch up.


I had also merged the pony tailed sections into bigger sections, so instead of having 16 pony tailed sections she now has 8. I had previously spritzed her hair down with some water and added moisturizer so the loose hanging hair isn't resulting from a braid out nor is it her normal curl spring-age its sort of an in between mixture of the two.


These butterfly ballies came from Meijer and the animal shaped beads came from Curly Princess Hair Boutique.


If you cant cornrow styles like these are perfect and are proof that there should be no reason ones child looks like a hot mess in public. All you need is simply pony tails or hair holders of some kind not even any skill or parting tool as asymmetrical parts are ultra cute and widely accepted as so and just as easy as it may sound you can just gather sections by hand and band em up.

Diva R's Mommy-Kim

Friday, December 30, 2011

Christmas Day Hairstyle

We started our blessed day of Christmas by opening gifts then having breakfast and going to church, followed by three family dinners and then quality family time at home.  Needless to say we were on the go from sun up to sun down and we always dress up for Christmas and go all out in Jesus name as Christmas is really in honor of his joyous birth.  This is why we celebrate Christmas and THIS YEAR was extra special because Jesus Birthday fell on a Sunday and our church had its service in his special honor and it was nothing short of a breath taking experience to be in the house of the Lord on his special day! 

We woke up and sung Happy Birthday to Jesus and proceeded on with our day.  We got ready for church and off we went so the switch up style that i did on Diva R's pony tail and cornrow style with finger curls was one that was simple and quick. I had to throw in our new red Sidewinders alongside our white and clear for the candy cane color representation to add a splash to her whole ensemble. These were the 2 inch size hair holders and i secured them each on with a small pony bead rubber banded at the ends.


Notice the amazing Christmas Bow that my sweetheart is wearing? It matches her dress to a T and was perfectly big for the occasion and not to mention its was a blessing from my friend Mommy A for my Diva specifically. (For your chance to win a bow of this quality stay tuned for our New Years Giveaway Bash to be 1 of 3 winners of your choice in bow!!!) This was the perfect topper to her whole outfit <3 In the above picture we were in church waiting for the service to begin.

Here is a side profile...


 I just simply braided the what were previously finger curls into regular braids which i ended with Sidewinders and the cornrows were left as is and just ended with Sidewinders. Total i used 20 hair holders and 20 rubber bands and this switch up took about 20 minutes.


Her hair is growing before my eyes! I am so proud of our amazing journey!

Here is the back profile...


Front...


 Here is the Diva in action on Christmas day doing one of her fav parts of Christmas Day <3


Diva R's Mommy-Kim